Adventures In Gingerbread Land

Wow, so for the last three weeks I have been off the radar again. (We had my parents here for two full weeks over Thanksgiving and I was pretty much banned from the computer except for business schtuff.) So anyway, at the beginning of Nov we had our date night group get together. Each time we get together we choose some sort of theme for the activity. This month Angie & Aaron were in charge and they chose “Traditions”. Angie’s family had a tradition of building gingerbread houses every year so that’s what we did! Angie and Aaron built the houses for each couple out of real gingerbread with candy stained glass windows, a front yard tree, and a light attached to the base. They did an awesome job! We had a very quick and casual soup and scone dinner before decorating our houses. We wanted to get on to decorating Here’s a shot of our little group. (L-R: Aaron, Brent, Angie, Kaisa, Kelly, Jeremy & Kristin) This photo shows all the sides of the houses. I brought my Kitchen Aid mixer up, which is a good thing because Angie’s mixer died right before we all arrived. We made TONS & TONS of royal icing and marshmallow icing. And had TONS & TONS of candy on hand. Once all the icings were made we went to town decorating. Everyone’s houses turned out just amazing and fun! Here are some close ups of our little house… I piped our initials on the heart window…. I couldn’t resist! Our cute little house made it safely all the way home from Salt Lake City… It even looked so cute in our front room…. until we went shopping with Mom and Dad and left Sadie home alone with it. I think we walked in on Sadie when she was at this point: Yes, that would be the roof. She was moving on to her second course following the devouring of the front yard and tree. The little twerp even gobbled up a window box. She ate the entire tree, too. I guess hot glue does pass, too. We’ll build again next year. But next time we’ll put the house up higher and out of Sadie’s reach. So, if you build a gingy house this year, have fun with it and put high out of reach of little paws… both the furry and non furry kinds. Inky Smiles!
An Inky BLACK FRIDAY Sale!
It’s that time again! This year I’m partnering with Linda at Craftaholics Anonymous for a Handmade Black Friday. All of our handmade InkStaks & RibbonStaks are on sale! AND I’ve added a grundle of miscellaneous goodies to the Special Deals & Buys section to help you with your handmade adventures! OoOoOh, AND the Original Scrapbox Big Boxes (WorkBox, CraftBox, MiniBox, SewingBox) are on sale, toO, SAVE $100.00 now with FREE SHIPPING in the continental US!! Store your supplies for handmade goodies! …ANNNNND… We are debuting a NEW HANDMADE INKY PRODUCT!! You can get yours FREE with any order over $50.00 during this sale… Click on over to Stamper Storage and check out the sales! Happy Shopping!
Pinterest.. Do you?
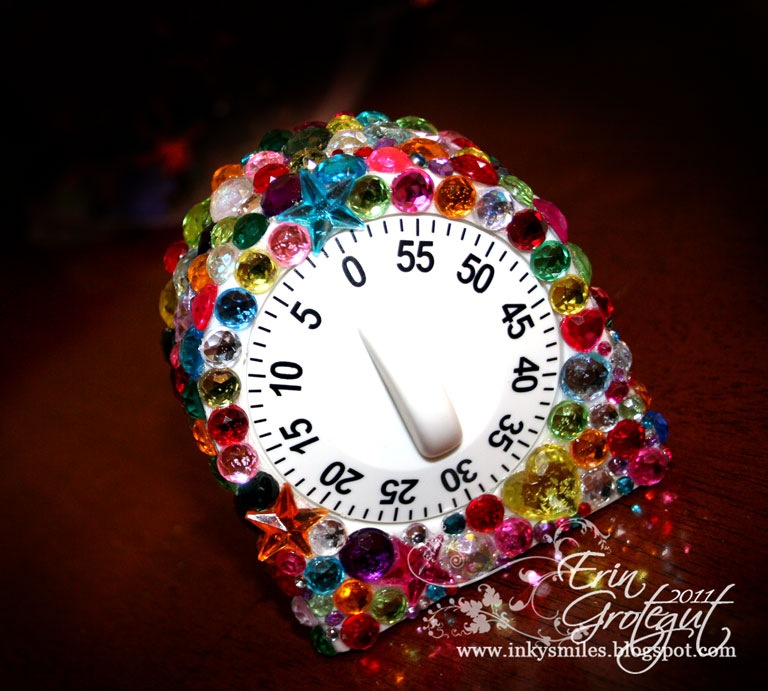
So for the past several months I’ve devoted a fair amount of time to a fabulous little website called Pinterest. Do you ? If you do, you know the amount of time that gets lost while surfing the fabulous eye candy of recipes, jewelry, craft projects, style ideas…. if you don’t well, you’re in for a major treat! Just a click away, Pinterest can transport you to the wilds of imagination and help you crawl out of your creative funk/slump. The first couple of months I was “on Pinterest”, affectionately referred to as PinHole by my sweet husband because of the black hole effect it has of sucking you in, I lost hours and hours of time… I had to find a solution. I loved the ideas that I was gathering, AND, using… (Yes, Brent has loved the new recipes we’ve been trying out… it means he actually gets to eat, haha!”)… but I have needed to set some limits on myself so that the rest of the house doesn’t appear to have been sucked into a black hole as well. So I started setting a timer – and I tell everyone I can who “does Pinterest” to set a timer. It is your pathway to FREEDOM. 30 mins per day , but not every day for Pinterest. It has been working great! I have regained MY TIME but still gathering ideas… and since I’ve limited my time spent browsing, I actually have time to DO/MAKE/CREATE the ideas I’ve gathered. My timer was a plain ol’ WalMart $3 something timer and I decided it needed a little bling…. I mean , since I was timing creative central, why shouldn’t my timer be pretty, too? So I pulled out some bling gems & E6000 glue and went to town. Lots of fun and loads of color! Happy Pinteresting! PS… Christmas Festivities have begun at the Grotegut house… tune in later this week for a fun post of this weekend’s festivities. See what these turned into on Saturday night!
Witches Night Out – Happy Halloween!
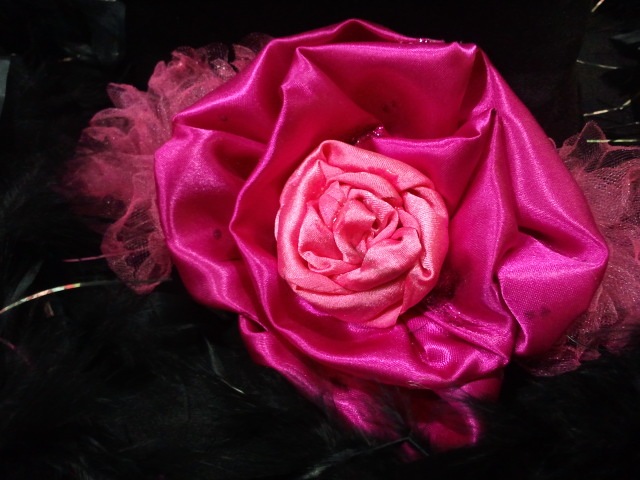
Happy Halloween friends! Hope this post finds you getting ready to go out a-spookin’ tonight with your kids or friends! Tonight Brent and I will be chillin at home with some movies, caramel apples and cider and answering the door for trick or treaters… when we run out of candy we will hide out in the basement. 🙂 A couple of weeks ago I went out “witching” with some girlfriends in Salt Lake City. There’s a shopping center called Gardner’s Village that holds an annual “Witch Fest” &“Witches Night Out” for the public. I’ve always wanted to go, so I was thrilled when Angie invited me to go with her. Angie had the day prior to WF off work so she came over to do some crafting… we ended up spending most of the day shopping for and working on our costume stuff. {Note – all pics taken with my cell phone, sorry for the poor quality of photos.} Snacks, glitter, tulle, glue, all kinds of fun goodies for crafting! Even my lovely Sadie got in on the action… She made herself right at home amongst my huge pile of hot pink tulle! Sadie just LOVES her Auntie Angie and wouldn’t leave her alone… I think it had something to do with the purple tulle bow that Angie tied around Sadie’s neck… Angie made a “grown up” purple and black tutu to wear over a fabulous thrift skirt she found and made into a ragged edge skirt and I worked on my hat and a pile of flowers for it and the tulle ruffle for my skirt. Tulle ruffle in progress. I gathered the tulle in sections by hand, then stitched it to some pink satin and then stitched it to the bottom of an existing skirt using long basting stitches so I could remove it for later. I love how the pink just puffs out from under my skirt 🙂 To make my flower piles I cut strips of pink satin and hot glued it while rolling and scrunching to create flowers. I made tulle flowers by gathering small strips and then using my heat gun to melt-scrunch the petals. I used the heat gun on the satin, too, and it helped create some more scrunching. Loooove how they turned out. I stitched the flowers individually to the hat. I added little dots of stickles glue to the main big flower for some more sparkle. I WAS going to wear these FABULUSH false lashes, but I got them on and it was like I was a horse wearing blinders… I could not see ANYTHING periferally and since I was going to be driving and trying to walk around in a big crowd that was not a good idea so I opted for a shorter, more reasonable, yet still lucious pair from my stash. I needed a fru fru top to go with the costume, so I bought a roll of “boa” and stitched it to the neckline of one of my existing shirts. I love how it turned out! I think we turned to be quite the cute witchy pair! Here are a couple of snapshots of some crazy witches on the train with us. I don’t think you can see how FABULOUS some of the hats are. It was hard to be “inconspicuous” while snapping pics on the train… I think the lady in the cream sweater/scarf knew I was taking her pic. LOL! It was a giant costume party… seas of hats everywhere… there were even some Pilgrims that showed up! We had so much fun! Next year we are going to have a hat party prior to the event so we can work on making some FABULOUS hats! We were UNDERDRESSED and UNDERHATTED compared to some of the guests! Here’s the group of us waiting at the Trax station, We decided to take the train to avoid the crazy parking lot situation. Witches Night Out is a HUGE event. Hope you have a FABULOUS Halloween celebration tonight! Be safe and stay warm! Inky Smiles!
Video Tutorial – Nickel and Dime Style Bling Rings
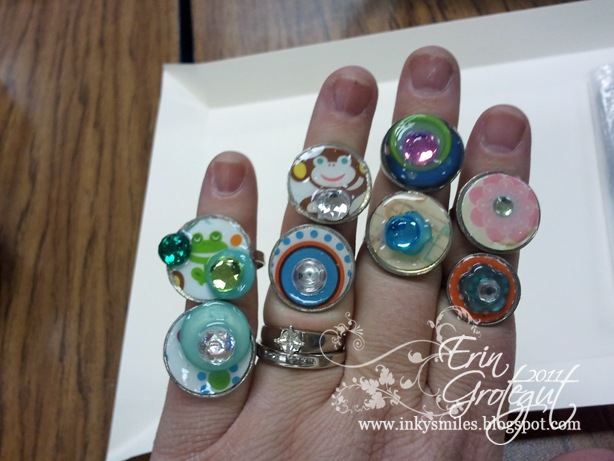
Hey guys! It’s been a LOOONG crazy summer! I know I’ve been MIA entirely too long. We have had so much going on around here and quite frankly, I decided to cut a few things out of my life for a little while and not stress about them. It’s been a nice vacation from the blog, but I think I am ready to get back into some crafty action again! We’re still in the process of remodeling our kitchen. We took a break from the finishing touches while we had family in and out for weeks and weeks and did some traveling for Brent’s job. And then I got sick the last big of Sept on our way home from a trip (some respiratory flu) and was sick until just last week when I finally went to the ol; doctor and became a walking pharmacy. haha.. feeling much better now, though. Oh, and it’s been “that time of year” again…. CANNING SEASON… We did BUSHELS and BUSHELS of grapes and tomatoes, peaches, and 40 lbs of chicken again…. It’s been fun 🙂 And I made a working website for my Creative University Charm Swap Ladies … I’m hosting again this year and it is going to be FABULOUS! There are still a few seats left for Creative University… hop on over and check it out! So anyway… One of the exciting things I am up to is teaching at the Junior High here in town. I am now the 4H Afterschool Club Bling leader. I’m teaching crafts and jewelry to a gaggle of 12-15 year old girls. It’s LOADS of fun and loads of work. The opportunity was something I sort of fell into, or rather it fell into my lap, unexpectedly. A friend recommended me to the coordinator and a couple of emails later I was knee deep in the planning. I’m quite enjoying it, actually! Today we made “Bling Rings” out of Nickels and Dimes, scrap paper, bling, and Glossy Accents. ‘Cuz a girl just can’t get enough bling, right? I threw this little quickie tutorial together tonight to show you how easy they are to make. [youtube https://www.youtube.com/watch?v=-8xhylBtKBw] Here are some photos from today’s 4H Club Bling adventure!
My Poor Neglected Little Blog & A Creative Escape
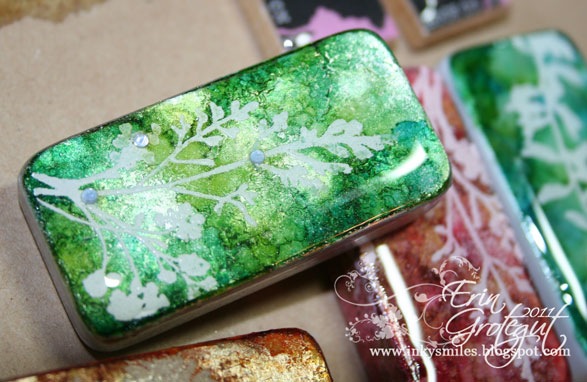
Hello friends! I bet you thought you’d never hear from me again. But alas, I’ve wandered back into Blog Land again. I haven’t really been very far away, though. I walk past this computer day in and day out, but I just haven’t sat down to write anything in aaaages. I don’t even know where to start again. SOOOO much has been going on here at our house since I last left you with the pics of the start of the kitchen remodel. We’ve been remodeling, had family, went to a fun card making class with Sue Neal, had more family (2 weeks worth), had friends come visit, did more projects, built a gazillion InkStaks, discovered a rather scary health issue, and I even had a mini retreat with some friends at my home at the first of August, with the help of my sweetie pie husband AAAAAAAAAAAAAAAAAND we’re almost done with the kitchen. LOL! No time for blogging, but I have been alive on Facebook (cuz I can do it from my phone on the go). A Creative Escape I think since it’s the freshest in my mind I will share with you some snapshots of our little mini retreat I did at my home with a few friends at the first of this month. Many of us met at Creative University and a couple are local friends here in town. We have been talking about getting together here in Utah for a fun little retreat getaway for some time now. This summer went completely crazy on me and we decided not to a full blown “go away to a hotel for a few nights” craft retreat and instead I moved some furniture around at my house, set up some spare beds and we did an overnight retreat at my place. We had so much fun! A few of us put together some projects to teach the group and we also worked on some personal projects. We even had delicious meals prepared especially for us by our personal chef, Chef Brent! He sure spoiled us! Here’s the gang… well, most of us… Amanda and Jen had some crazy things going on that weekend so they were in and out. Amanda missed our group shot. Never fear, the magic of Photoshop Elements can sneak her back in. HA.. I’m a lousy extractor/editor, but this works…. That’s all of us. Left to Right: Kim Garrett, Lisa Tafoya (pink shirt), Tahne Timmons (batik shirt), Jenalee Graves, Bobie Glassett, Amanda Bartholomew, and mE. When I say we crammed in my front room, I mean we crammed… Next time I will take the couch out and stash it somewhere.. {HAHA.. good luck with that, Erin.. it might have to go on the porch!} Friday night dinner and treats were “FFY” – Fend For Yourself… we went to dinner at Mi Rancherito here in town and enjoyed some lovely Mexican treats. We came home and had fun playing and creating for the evening. I taught the group how to make altered domino pendants. They all turned out just gorgeous! Here are our pendants (and my art charms) on a tray just after being resin’d. The no name pendants are some extras I made while playing around and practicing this technique the day before. I like the technique so much that I just kept playing. It’s addictive! Here’s my finished charm that I glued a bail onto and strung on a chain. Once we all had our pendants covered in resin and placed out in the warm garage to cure we crafted some more and giggled and giggled until the wee hours of the morning. The night is a blur to me. LOL! Saturday morning-ish we slowly hauled our tired bootays out of bed and enjoyed a delightful breakfast that Brent prepared for us… on of my favorites, Overnight French Toast with an orange maple syrup, fruit, breakfast sausages, yogurt, and juice. YUM! Saturday was filled with lots of crafting and more yummy food prepared by Chef Brent. Tahne taught us how to make an “inverted round chain maille” bracelet that surrounded a string of Swarovski crystals. I chose a really pretty green crystal called Erinite. For real. Not kidding. I love it. Tahne created little kits for us in these darling little personalized tins! For the most part, this bracelet wasn’t that hard to do. The part that was most troublesome was getting the first set of rings started properly. Somewhere in here we took a break and enjoyed a yummy lunch – my famous chicken salad sandwiches. I made salsa the night before and it was almost perfect the next day. I think it could have used the other half of the jalapeno… Sleep deprived chicas making funny faces at the photographer… Bobie taught us a really darling post it note holder that you can make with a couple of scraps of paper, some ribbon, and a daaarling little teeny tiny pen from Staples. Complete directions can be found in August 2010 on her blog-www.scrappyandcrafty.blogspot.com Amanda put together kits for a 2 page layout for us using CTMH’s retired Cocoa Cafe paper and loads of buttons and chipboard goodies. Here’s her layout. I haven’t finished mine, still need to stitch around the edges and add photos, but I will share it soon. Saturday night we enjoyed a delightful dinner that Chef Brent cooked for us in the dutch ovens outside. He’s a seriously good chef and makes the best Italian food, too! He made homemade garlic bread, a big green salad, and dutch oven Chicken Parmesan. For dessert I made an ooey gooey yummilicious apple crisp. I totally spaced vanilla ice cream so we just drizzled some fresh cream over it. YUM! We also did a charm swap with an Oldies Rock N Roll theme. Kim turned her charms into a jumble/junklace necklace charm and I loved her idea so I blatantly copied her. Here’s my jumble: Lots of loveliness and sparkles!
The Stamper Storage Becky Higgins Giveaway Sneak Peek!
Here’s our prize package. It is going live on Becky Higgins’ blog tomorrow and you gotta make sure you hop on over and enter to win! Click on the photo to automatically go to Becky’s blog. Becky will not be sending emails to let you know you’ve won. You will need to check her blog when she announces all the winners on Monday 7/11. Good luck & Inky Smiles!
Not Quite Dead Yet… and Something AWESOME!
Hey friends!! Just popping in to let you know we’re “not quite dead yet”… The kitchen is coming along NICELY and we’re nearly done. The cabinets are up (but need to change the door color) and loaded up, the floor is in and we’re waiting for the coutertop guys to cut and install the granite. Hopefully that happens next week! YAY! I am so stoked to get this kitchen done. It’s so much bigger than it was and it’s still surreal that we finally tackled this project. I have some lighting to switch out and last night Brent changed his mind on the paint color and thinks the red is too dark with the cabinets, so guess what we’ll be doing this weekend? Haha! I will be updating the blog with some photos of the progress in the next couple of days when I finally have some down time. (We have had company come throughout this mess and more coming tonight.) I haven’t spend much time on my computer in the studio in weeks. I’ve been facebooking from my new phone because it’s fast and easy and I can do it from wherever I am. I do have some AWESOME news to share with you all! This week we are participating in Becky Higgins’ BIG WEEK OF GIVEAWAYS… Check it out:Our give away day is Wednesday, July 6th! Make sure you stop by her blog @ www.BeckyHiggins.com to see all the giveaways! I will post our giveaway late Tuesday night here on the blog and then it will be live on Wednesday on Becky’s blog. There are 10 sponsors per day… make sure you leave a comment with: 1) Your name (first & last) 2) Where you live 3) The Item You want (with it’s item #) Becky said she doesn’t want any extra fluff in your comments… just provide these three items of info or they will skip over your comment (too much to read). You can read more about this and watch her little video HERE. PLUS!!! We’re having a sale at Stamper Storage to celebrate this fun week of giveaways! Hop on over to our store to see the sales! Hope to see you playing along next week! Inky Smiles!
A Birthday Bunch!
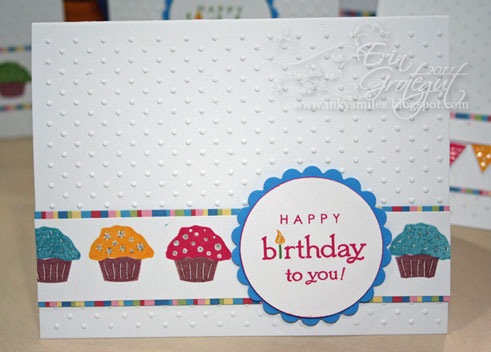
{This was supposed to post on Monday but I had some troubles with Blogger and uploading from WLW. } We’re still in full construction mode here at our house.. all of the destruction is done (minus the removal of some old floor tiles) but for the most part we’re gearing up for the “put-it-back-together” phase. The kitchen is mostly gutted (pics to come soon) and we have an inspection tomorrow PASSED our inspection YESTERDAY for our 4 way (electrical, plumbing, framing, etc) and then we can move forward… YAY! I did take a break to create some birthday cards. There were six, but one met an untimely death by gruesome mangling when I was moving things around down here in the studio so Brent could move the gas line (in the ceiling)… card #6 is now resting piecefully (misspelling intended) in the city landfill. It was a third “banner” card and was so cute. I will have to make another soon. These cards were super duper easy to make. I employed Mr Cuttlebug and raided the scrap bags for some coordinating colored cardstocks. The stamps are from PTI and are waaaaaay old. I love this set because it’s got so many sentiments and small images. There’s a lot of glittery bits (around the stars, on the cupcakes and banner pieces, etc – they look grayish) on these cards that was difficult to photograph, but you can see them a bit in some of the single pics. I popped up the banner pieces with foam tape. I love the 3D effect! Thanks for popping by! Hope you are having a fantastic week! Inky Smiles!
Kitchen Remodel Part I
We’ve been in our house now for over 10 years and we’ve made maaaaany changes to it. We’ve finished the basement from the concrete up ourselves (only hired out the carpet), ripped out carpet and linoleum and replaced them with wood floors and tile, ripped out our master bathroom and completely remodeled it and have painted gallons upon gallons of paint and added trim and other fun detail pieces to our home. We’ve been gearing up for the biggest change ever in the history of “Brent & Erin Remodel Something” for the last little bit and have already been busing going gung-ho on Project Kitchen. My kitchen is not too teeny, but it’s only got one small section of countertop (we refer to it as “spot ‘o’ counter top) space and the layout is kinda wonky for what we need in a kitchen. We’re pushing the kitchen wall 3 feet out into the garage (into “extra” space) and doing some reconfiguring and purchasing new custom built cabinets for our kitchen. The dream prior to this was to add a whole new kitchen on to the garage but that is way bigger and more costly of a project than what we were willing to do. Here’s a “before” of our kitchen when we very first moved in. It was nice, but VERY anemic…. So then 5 years later we decided paint would be a good thing… ok, well *I* finally figured out what I wanted to paint.. haha… Brent chose the colors. We also added some trim (4” crown moulding and a plant shelf) to the top of the 8’ wall that divides the kitchen and front room. The trim really popped and made the walls look awesome and gave the house a more finished feel. A few years later we had the “Giant Poo Flood” (aka sewer back up in the basement) and so we went to work on redoing floors in the house… you know, “while we were at it”.. .haha! We replaced the old, icky, holey linoleum in the kitchen and dining room with 18” tiles. Minus the old ratty oval rug this is how my kitchen has been for the past 2.5-3 years. And then a little over a month ago we discovered a leak in the water line to the fridge/ice maker…. it slowly dripped and flowed under the tiles in the kitchen and we had to remove about 18 tiles (we removed them until we found dry concrete backerboard) from the floor. We cut out all the concrete backer board and let the floor sit open for several weeks to dry and while we thought about what to do… Then we had this bright idea to do some reconfiguring… move the fridge to where the current pantry is and some other “tweaking”… And this is where I’ve been all week and what we’ve been doing around here. Here are some snapshots of the work in progress. You can click the image to view larger. We’ve made some crazy huge progress since this last photo of Brent putting up the new kitchen/garage wall. I will be back soon with more progress reports. I’ve gotta go help Brent move the water line. Constructiony Smiles!