Vintage Cone
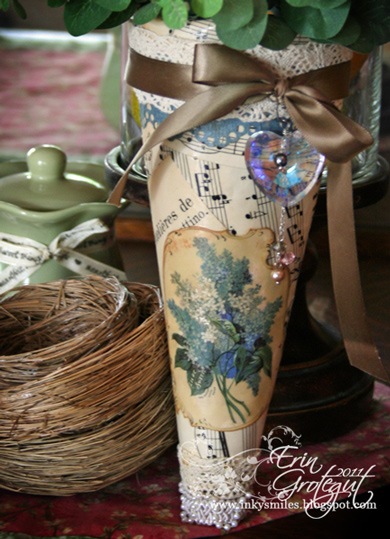
I saw an idea for a vintage cone on The Graphics Fairy blog a while back and decided that I wanted to make one, too. I’m finding myself drawn to vintagey goodness lately. Anyway, I dug out some styrofoam cones that I had stashed away in my craft closet for a Christmas project that I never got to, cut it in half, and started playing around with paper and Mod Podge. All images are courtesy of The Graphics Fairy. If you’ve never been there you have got to stop in and take a gander and download some of her FABULOUS vintage images. Lovely schtuff! I had a really difficult time taking photos today and it’s been very cold and dreary today so the lighting was not all that great, so please forgive the lousy photos. I tried taking them in my studio first and then moved upstairs to the front room in hopes of some decent light. It was a little better. LOL! Overall I like how it turned out, but I think I am going to add some off-white & bluish lilac sprigs to the top part to give it more “fluff”. This little altered cone is meant to be hung on the wall and I am still trying to decide which wall it will grace in my home…. currently I’m thinking it would really pop nicely on the chocolate brown walls in my front bathroom …. hrmmmmm….. You can’t tell in the photo but each little vintage card (images printed from TGF onto white cardstock and aged with Tim’s distress inks) has been glittered either on the birds or the flowers/leaves. In real life they shimmer nicely! Bird envelope pre-glittered. I plucked this crystal heart and jewels off of a junklace that I don’t think I will be wearing any time soon…. LOVE it. Thanks for popping by! Inky Smiles! PS.. the feather in my hair is hanging much nicer today since the hair got a good wash, dry, and straightening. Love it!
Pile O’ Loot – The Winners!
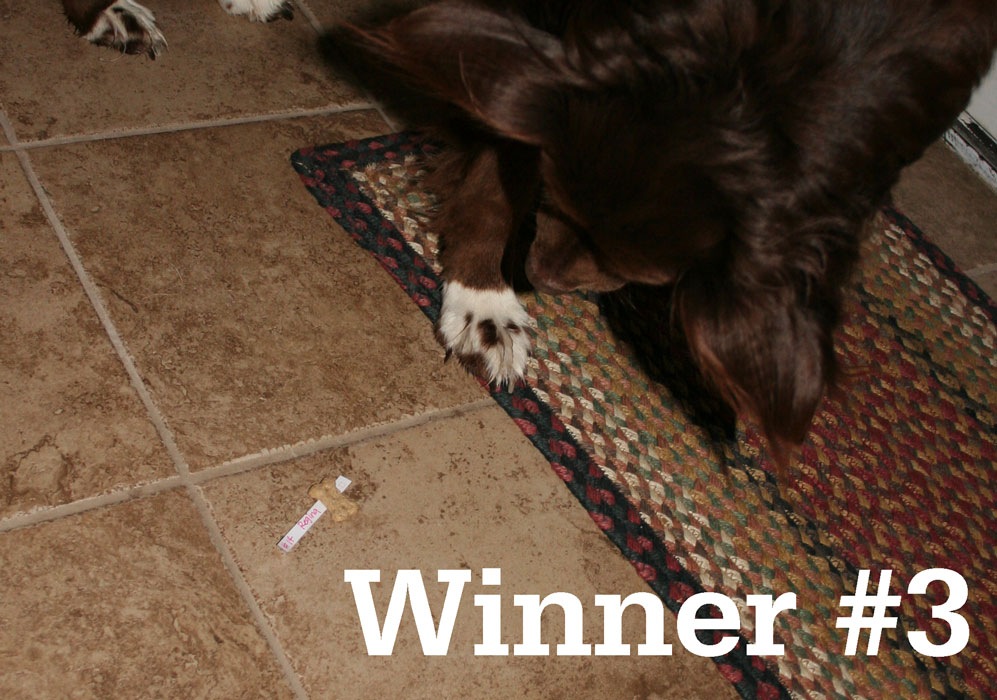
Hey friends! I’m late in the day posting the winners. I was off having fun this afternoon getting my greys cut and covered and adding a different kind of color to my hair… (Forgive the awful webcam pics. LOL!) I added a couple of turquoise feather extensions to my hair! I’ve been thinking about it and decided to do it this time. They are pretty much just like reg hair extensions, held in with a crimp bead, and you can wash, dry, curl, and straighten them. I was playing with them at the salon and they look way cool curled! So fun! I think I might need to move mine a little farther forward.. we’ll see tomorrow when I style my hair myself. 🙂 So anyway… for what you really came here to read about today! Instead of drawing names from a hat I used a great idea that Michelle Johns gave me. I wrote everyone’s names down on a piece of paper and armed with a bag of doggie treats put them around the front room in various places with a little treat. Brent kept Sadie in the kitchen while I laid everything out. When I was ready he let her in and I followed her with my camera. (I’m not sure what happened to the bottom left photo.. it must have been in gif format when I dragged it into the collage, weird.) ANYWAY… here are the winners in order of being chosen/gobbled by our sweet Sadie… Congratulations to our winners: 1) Judith #1 2) Robin #2 3) Regina #14 Looks like we have some candy traveling overseas! I will put “gift” on the customs labels and declare the value $1 so you won’t get charged horribly in fees. Please email me with your mailing addresses by Monday, May 23rd. Please put “Pile of Stamps Winner” in the subject line so I don’t miss your email! Inky Smiles!!
IMPORTANT: Please read
UPDATED: It appears that the previous post has been restored but no comments. ARGH! Let’s hang in there and see if the comments come back. If they don’t by the end of the day I will start the giveaway over. There were so many comments that were lost and I am beyond frustrated. Dear friends, Blogger has been DOWN for the past couple of days. I am sure many of you who are bloggers and who read blogs have noticed this. Because of this issue with Blogger my last post has disappeared along with all the comments. I am so frustrated with this. I am going to wait a couple of days for Blogger to try to restore my post and the associated comments. Hopefully they will get their acts together and figure out what went wrong and make the necessary repairs. If Blogger does not restore the prev post and associated comments I will repost it and we will try to find some winners again. If I could, this would be the face I’d make at them. I am so sorry for this inconvenience. Love, E. (PS. This is “J”, my friend’s one year old – photo taken while trying to take his 1 yr photos.)
501-th Blog Post Giveaway – A Big Pile of Goodies!

I’ve been sitting (well not literally) on these goodies for a long time now waiting for just the right time to do a giveaway… I wanted to do it last post, but my Archiver’s projects for NSD took over. I’m not sure when National Stamping Month is, though this would be the perfect give away for that, but I don’t want to wait…. SOOOoOOOoO dear crafty friends… would you like to win some of these fabulous red rubber stamps? I have a huge pile of unmounted red rubber stamps that I am splitting up between THREE lucky Inky friends!! I ordered these online from My Sentiments Exactly and picked out my favorites and piled up the rest… Look at all these red rubber goodies! They have a sticky foam back on them already.. it’s not permanent, but it’s also not “cling”. You can remove the stamps easily from various types of blocks. You can read this post about using cling mount/red rubber with acrylic blocks or watch a video here. I have TONS left to share… wanna see? Can you guess how many are in the pile? Do you want part of this pile of goodies? I’d love to send some to you… here’s what you have to do to enter: 1) Leave a comment on this post – tell me what your favorite post in the last couple of years has been on this blog. (It should not be this post. :P) 2) For an extra entry share this post on your blog or facebook page. (leave a link to your blog, please) and leave another comment on this post. 3) For 3 additional entries make a purchase from my Bargain Basement. I’ll add your name to the hat 3 more times. You must email me to purchase anything. You may do one or all three options for a total of 5 chances to win. I will leave this giveaway open until Tuesday, May 17th. I will post the winners on Wednesday, May 17th. Winners will be chosen by drawing names from a hat. * Please email me to claim your prizes by Monday, May 23rd or new winners may be chosen.
Happy {belated} National Scrapbooking Day & 500th Post!
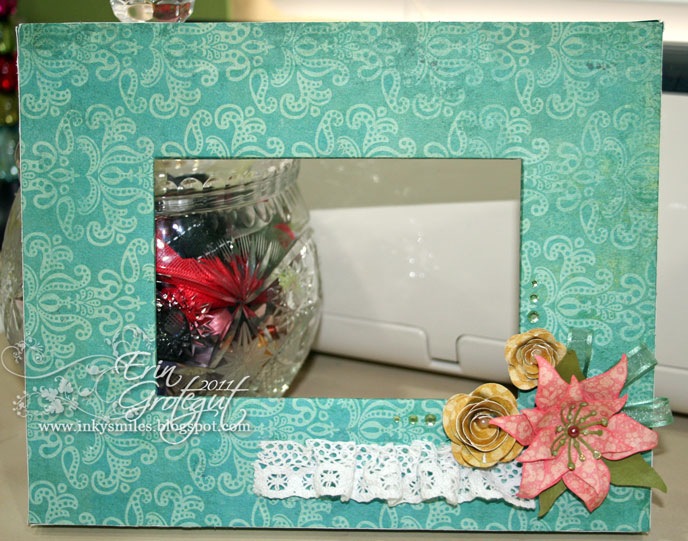
Yes, belated again. LOL! I was too busy actually PLAYING on NSD too blog about my crafty projects (not to mention my laptop has died and needs a new motherboard so I didn’t bring it with me) so I’m going to blog about the day’s festivities today! And how fitting that a post about National Scrapbooking Day on a crafty blog is my FIVE HUNDREDTH POST!!!! YAY ME! A while back I went to an Archiver’s customer appreciation crop and met some neat people, including my friend, Terri. Well, long story short Terri invited me to go to the Archiver’s NSD all day crop this past weekend and we had so much fun! I’m really enjoying the Archiver’s crops and visiting with fellow crafters while we create our own little works of art. Usually the “big” crop days at A’s include some sort of project in addition to the free make n takes in the store. This crop included a neat little altered frame and the store had a two page 12×12 layout to make. Here’s the super cool frame we made: You can also turn it vertical! Love my vintage doll peeking out from behind! Those of you who know me know that I can’t seem to follow the instructions/sketch/sample of any project.. tee hee! I traced the frame out onto the really cool My Mind’s eye paper and adhered it to the frame, mitering the corners on the inside of the frame to give it a nice finished edge. I also traced the sides and used my fingertip craft knife to cut out strips from the reverse side of the MME paper for a nice contrast. I made the flowers as they mostly suggested but laid it all out my own way. I added some extra petals to the lily and used an additional rose in lieu of a lace/button flower. I used the lace as an accent and gathered it while hot gluing it down to the frame. (They had this super cool hot glue gun that did NOT burn me! Gonna have to look into that and procure that little treasure! So if any of you reading this know what I’m talking about please leave me a comment on where I can find it!) I also added some green Kaisercraft rhinestones and bits of ribbon (that was originally intended to hang the frame with) to the frame and some Kaisercraft pearls to the centers of the flowers. I used diamond Stickles on the stamens of the lily. We also made a cool 2 page 12×12 layout. I don’t do a lot of paper scrapping lately, but this was way cool and used a method of paper scrapping that I have been thinking about for a while now. Here’s the first page… a traditional paper layout. I left it in the plastic sheet, sorry for the glare. I really like the notebook paper punch that we used on the green ledger/graph sheet and I love the big huge die cut “negative” frame. I just need to find and resize some photos to put in there with a larger family pic. I am thinking I might redo the large butterflies.. trace them onto some solid red paper and hand cut them. I’m not digging the pattern on pattern… it’s almost too dizzying for me. I do really love the funky ruffled button flower that we made using a new product called Glubers… which are basically a round, super sticky, giant glue dot. I am hooked. The second page of the layout was a super simple, “my kind of paper scrapping” layout. I’ve been liking the idea of making a few really special “traditional” layouts with my digital stuff and then intermixing some “pocket pages” into the whole thing. We made a “pocket page” layout at Archivers for the second page. The idea is that you make some “mini” layouts/embellishments/journaling spots and drop them into pocket pages and fill the pockets with photos. I LOVE THIS. Here’s what we made. I dropped a few 4×6 photos that I had on my desk into the pockets just for the overall idea. Here’s the page w/out photos. Fast little 4×6 mini pages for either journaling or extra photos… And here it is with some photos dropped in. This sure would be a great and fast way to get caught up on all my photos… all the many THOUSANDS of them… especially old –pre digital – photos that are already printed and needing new permanent homes and a GREAT way to use up small scraps of paper! I think I’m going to do it! One of the highlights of the night was meeting a group of girls from Provo Craft. I was chit chatting with them about some cool projects they were making. One of them, Shannon, was showing me a couple of new Cricut cartridges, Damask Decor and Martha Stewart Cake. Martha Stewart cake has all of the Martha Stewart punches as borders that you can cut with your Cricut.. how awesome is that?? And Damask Decor is choc full of gorgeous damask designs… and while I was standing there oogling and drooling over the Damask Designs… Shannon GAVE it to me… I was floored! So Miss Shannon, if you are reading this… THANK YOU, THANK YOU, THANK YOU from the bottom of my heart 🙂 I am cleaning up my desk so I can pull out my Cricut and play with this cartridge this week! My National Scrapbooking Day was awesome and I had so much fun! I hope you all did something fun and scrappy, too! Inky Smiles! PS.. coming very soon (like in a couple of days) to celebrate 500 posts… a really fun giveaway! Stay tuned!
Happy {belated} Cinco de Mayo & a recipe!
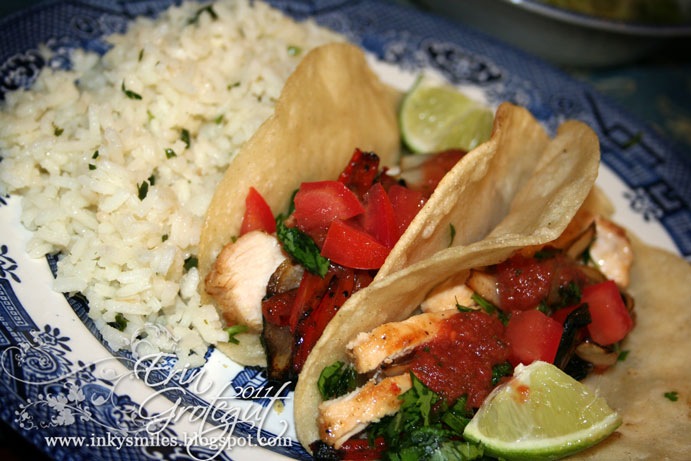
Hey friends! We’re just chugging along here enjoying this spring weather we’re having here in Utah this week. It’s been so freezing cold and this week we’ve finally had some warmer weather! It’s been in the 70’s the past couple of days! That sure beats the 40’s and 50’s! Anyway… Brent and I took the opportunity to do a little grilling last night and “celebrated” Cinco de Mayo. We marinated some chicken Weber’s Tequila Lime marinade and then tossed it on the grill. I’ve got to figure out how to make this marinade without the use of a “packet”. This chicken is out of this world delicious and we like to eat it in salads and on “street tacos” which is what we made for our dinner. You can read about street tacos here. I love getting carnitas street tacos from the little Mexican cafes here in town. They are sooo yummy! For our version of a street taco I lightly fried eight (reserving 4 for leftovers for lunches on Friday) corn tortillas.. cooking them just enough to make them soft and then set them out on paper towels. We sliced up some red peppers and white onions into strips and put them in our basket on the grill and let them cook while the chicken was cooking. To make our tacos we just piled up a few slices of chicken, some grilled veggies, diced tomatoes and shredded lettuce (well, Brent did on his), chopped cilantro and drizzled some homemade blender salsa over it. You top the taco with some fresh lime juice.. MmmMMm! Be careful, these are very juicy! I’ve been wanting to make Cilantro Lime Rice for the last couple of weeks and it went perfectly with last night’s main course. I created this recipe (it’s pretty basic) by combining a plain jane CLR rice recipe with parts of a delicious Spanish Rice recipe and it worked out perfectly. The onions, garlic, and chicken broth give it a nice savory flavor (not just white rice with lime poured over it). Cilantro Lime Rice from the kitchen of Erin Grotegut 2 Cups rice (I used Calrose) 3 Cups chicken broth 1/4 C white onion, finely diced 3 Tbs butter 1/2 tsp salt 2-3 garlic cloves, crushed 4 Tbs lime juice 1/4 C cilantro, finely chopped 1) Melt 2 Tbs of butter in a stock pot, add rice and onions and coat rice with melted butter, saute for a few mins until onions are near translucent, but not brown. Add in garlic and saute until it smells very aromatic, being careful not to burn the garlic. 2) Add salt, 2 Tbs lime juice, and chicken broth to pan. Bring to a boil and then cover and simmer for 15 mins. Let sit covered for 5 mins. 3) Just before serving add in the remaining 2 Tbs of lime juice and the cilantro.. toss together and serve hot. There you go! A super easy and perfect “I want summer here” dinner. Enjoy!
E is for mE… or sprEEEEng…. or ….
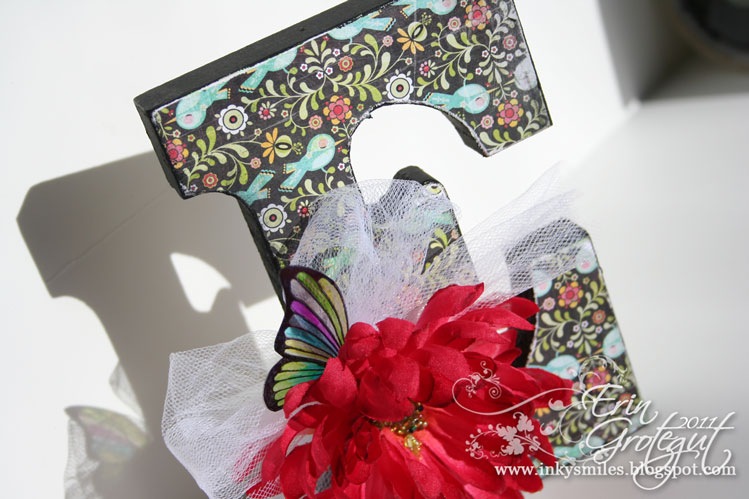
I made this cute little E a while back for the wall/window of E’s in my studio. I’m really enjoying altering things with Mod Podge and paper. The past couple of weeks I have Mod Podged fabric, ribbons, paper, wood, fabric over paper, ruffles, chipboard, all sorts of interesting things. And did you know?? You can Mod Podge carefully over rhinestone bling and it still SPARKLES! (I found this out on accident.. tee hee!) So anyway.. here’s my E. It’s made from a way old wooden E from Robert’s Craft. I covered it in black paint and then traced it face down onto some BG Urban Prairie paper which I cut out with scissors and Mod Podged (matte sheen) to the E and then trimmed up with my craft knife. The flower is made using a silk flower which I glued on to the E and piled a ton of multi colored seed beds into the center of and then covered with Liquid Glass/Diamond Glaze and let dry over night. You can see how I did the butterfly with this Faux Stained Glass technique. Instead of embossing the image I used a black StazOn ink. This altered E is a fun little addition to my studio. I love how the sunlight shines through the butterfly and leaves color on the wall/photobox behind it and is just perfect for sprEEEEEng … if it ever gets here! (We’re due for snow tomorrow… ) EEEEEnky Smiles! mE.
My Sunshine….
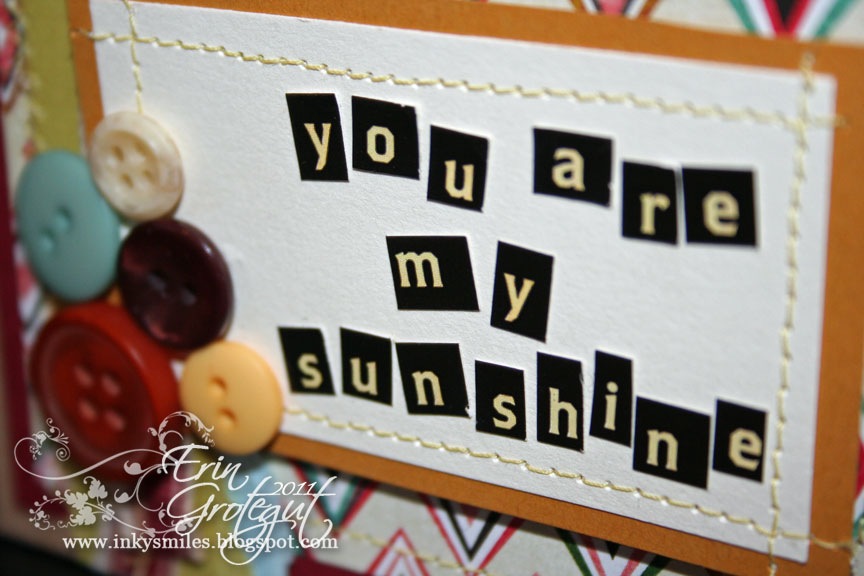
I love my husband. He is my best friend and he brightens each and every one of my days. He also just celebrated a birthday… which meant I needed to make him a card. I always struggle with masculine cards so I went with something super simple but to the point. I gathered up some miscellaneous buttons and pulled out some my scrap paper bin and searched through the patterned paper for something fun and a little funky. I kinda had an idea rolling around in my brain and just needed to get it out of my head. And I like how it turned out. 🙂 I knew did not want to stamp on this card so I pulled out some fun little alpha stickers and trimmed them up to fit the sentiment “mat”. When I had it mostly assembled (dry fit) I decided it needed a little something else so I threaded Bernie and did some machine stitching for a little texture. I tore some strips of scrap paper and “stitch bunched” a ribbon onto the strip as well. I think he liked it, too! Inky Smiles!
Bargain Basement – A New Addition
Hey inky friends! I just wanted to let you know that I’ve been making some changes on the blog.. I’m cleaning up a few things and created a new navigation menu along the top of the blog, just under the header. (A lot of you read blog posts in your reader or other rss feeds so I wanted to let you know of some updates.) For a long time I’ve talked about doing an Inky Smiles Yard Sale but I just haven’t ever gotten around to it. I’ve sold off a lot of my stamps and goodies to local friends but still have more goodies to sort through and find new homes for. One of the pages I’ve added to the blog is the “Bargain Basement” where I’ll be selling gently used stamps and other art supplies for nicely discounted prices. Hope you’ll stop by and check out the goodies! Inky Smiles! Edited: PS – I’m not quitting paper crafting, just getting rid of items I either don’t like anymore or just don’t use anymore. 🙂 I still have tons of stamps and paper crafting goodies to play with!
Happy Little Breadmaker!
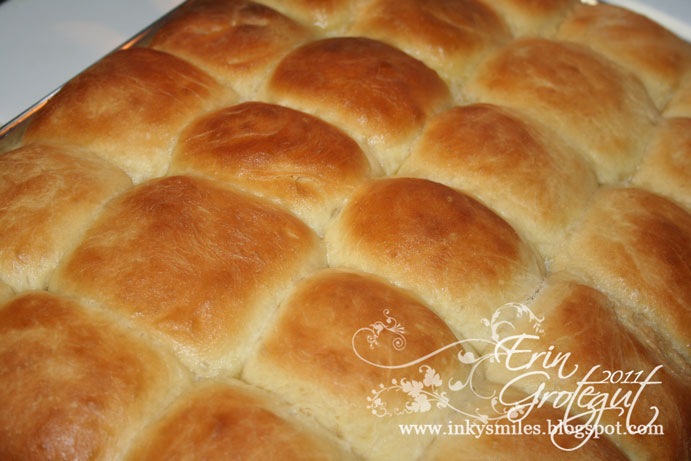
Lately I’ve felt the need to learn a different set of “skillz”. I’ve never really been able to make bread and I hear my friends talk about their “breadmaking days” and I’ve always felt a little bad cuz I haven’t been able to make a decent loaf of bread. {Brent usually makes the bread and pizza dough in our home. He’s pretty good at it, too!} Don’t get me wrong.. I like to cook and like to think I am pretty good at it… but bread baking, that’s a whole other story. Until now… Well… last week, anyway. Last week my sister was raving about some delicimous rolls that a friend of hers made… so of course I begged the recipe from her so I could try it out. *buwahaha* The recipe was super duper easy and for the first time EVER I did not kill the yeast. I usually kill the yeast. Dead-O. Even the instant dummy proof kind. Here are a couple of snap shots of the rolls I made. They smelled so delicious I barely let them cool before snitching one and eating it. *grin* {We usually only eat wheat bread, but I took my wheat flour out of the fridge and it smelled like fridge and since flour usually tastes like it smells I opted for a white version.} And then on Monday of this week I used the same roll recipe to make regular loaves of bread. I just kneaded it longer and let it raise once , then punched it down and formed into loaves and let it raise in the pans on the counter. I was reading in a bread baking book that it helps to form a nice crust if you bake it at 400 for the first 10 mins and then turn it down to 375 for the remaining 20-25 mins. I let mine go a little long at 400 (oops!) and so the crust cooked just a little darker than I’d planned, BUT it still tasted DIVINE.. especially with some butter on it. Nom, nom… Eventually I will figure out the right amount of dough to get equal size and well proportioned bread. Until then the big loaf will look like a runaway from the Hickory Kist deli… (they make some major huge loaves!) I am so excited about this! Usually I kill the yeast and get a partial rise from the bread… or I do something else wrong and get a huge hollow section under the top crust… or it just tastes gross or is all dry and crumbly. This bread has 3 eggs which gives it a nice moist and dense (but still light) texture. It’s YUMMMMY! These were made without the use of an automatic breadmaker, too! {I used to own one but it made crappy bread so I tossed it. Ok, call me picky. :P} I used my Kitchen Aid Pro mixer to knead the dough {you should’ve heard the heavens open up and my wrists rejoicing} and let them rise at room temp.. nice and slow. Hope your mouth is watering like mine.. I think I’ll go slice off a piece for lunch! Back soon with some papercraft goodness! Inky Smiles! Updated 4/21/2011: PS. I did call my sister again and ask her if I could share the recipe… but I received a no answer… it’s a “top secret” family recipe from someone who won some awards with it. I did find a recipe online that was very close. Please see the comments in this post for the information.