Faux Stamped Candles
I am feeling loads better today. It seems that the iron is actually kicking in and I am feeling human! YAY! I even went grocery shopping for last minute food items that I’d forgotten on the “big pre Christmas” trip on Saturday. I planned on posting this yesterday but got caught up helping B in the woodshop with a couple of Christmas projects for two small girls….
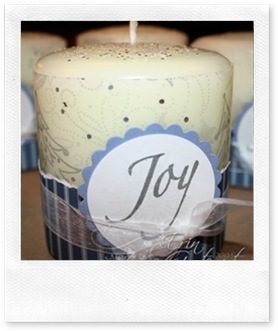
This year I wanted to give something fun and simple for neighbor gifts with the usual treats. I picked up these candles on a super duper clearance after Christmas last year at WalMart. Luckily my wonderful husband was on board with the project! Neither of us wanted to do the traditional stamp on tissue paper method since we were doing these in bulk so we found some fabulous pre-printed tissue paper at CostCo and decided to make Faux Stamped Candles.
As always, you can click on the photos for a larger view.
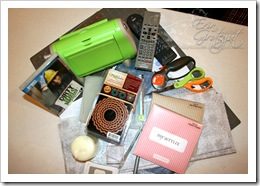
Step 1: Gather your Materials
Beg your hottie husband to help…
Note the happy husband supplies… Dirty Jobs DVD & a couple remotes! 🙂
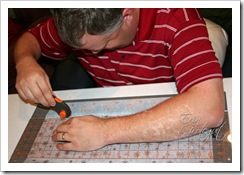
Step 2: Measure and cut tissue paper to fit your candle.
I’m using a 3” pillar so my tissue paper needs to be 9.5” x 3 3/4”.
Step 3: Measure, cut, and tear ( 1/8”) DP for candle band.
Mine measures 9.5” x 1.5”
Step 4: Make a note of missing supplies and beg sweet, hottie husband to find them and fetch them for you (because you’re sitting in a recliner trapped behind the craft table in your family room). Measure and cut wax paper (4” x 12” or so).
Steps 5 A, B , C & D: (A) Cut out circles and mats for sentiment. I used my Nestabilities classic circles and classic circle scallops. (I purchased them from myself… I have more in a variety of shapes and sizes for a great deal if you’re shopping for them.) (B) Stamp background snowflake, (C) Stamp sentiment in darker ink, (D) Add glitter to sentiment with a glitter pen.
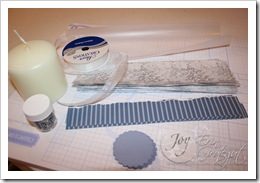
Step 6: Make assembly pile of candle parts.
Step 7: Realize that you’re a dork and left more supplies off the supply list and beg your darling, sweet, hottie husband to find and fetch the forgotten goodies (because you’re still trapped in the recliner behind your craft table in the family room).
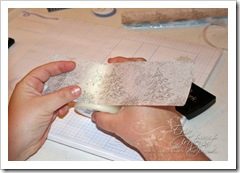
Steps 8 A & B: (A) Roll candle on versamark pad. This sticky ink helps the paper stick to the candle for eas(ier) positioning. (B) Adhere tissue paper to candle and smooth out wrinkles.
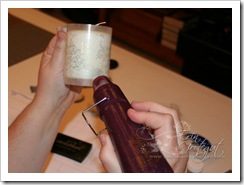
Steps 9 A & B: (A) Wrap wax paper tightly around candle. (B) Heat up heat gun and blow at wax paper to melt tissue paper into candle. Keep the wax paper held tightly to prevent bubbles and drips. Be careful not to burn your fingers (yeah, yeah… I’m a slow learner!).
Step 10: Peel off wax paper and use heat gun to touch up any spots that need to be smoothed out or finished.
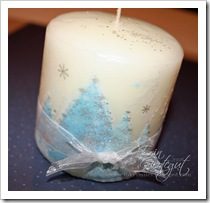
Steps 11 A & B: (A) Place candle in a craft tray and use heat gun to quickly melt the wax on the top of the candle. ~ Seriously, you have to be quick at this… it melts fast and it cools fast. (B) Sprinkle glittery sprinkley stuff (I used Beadazzles by Suze Weinburg) all over the top. You may need to heat again to help them melt in.
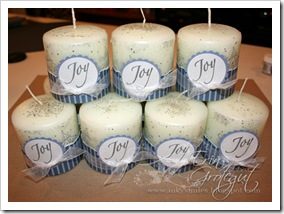
Step 12: Finish it up by wrapping the DP around the candle and attach the sentiment with foam pop dots/squares. I used American Crafts squares because they are my fav dimensional adhesive. Voila! You have a beautiful, simple, relatively quick gift. 🙂
We made a few variations with different tissue papers… it’s loads of fun! You can also stamp on plain tissue paper with reg stamps.. just be careful about using water based inks, especially reds, because they can sometimes run when the wax becomes liquid and the images can blur out.
PS/Disclaimer/Warning – for decorative use only… remove paper if you’re gonna burn the candles.
Merry Christmas & Inky Smiles!









9 thoughts on “Faux Stamped Candles”
Oh my goodness. That is such a cute, creative idea! You are a pro.Big props to Brent to even know what to look for and where to find it when sent to look for craft supplies and even more bonus points for helping in the first place! Merry Christmas!
This is completely adorable. Love the hottie hubby helper you have there. Great tips here, I’ve never attempted this technique, but feel I could now.
Thanks for the step-by-step technique!!!! Great candles, they turned out amazing. (I don't think you are a dork at all, but you are very funny & creative!)
OMG!!! These are just beautiful. I have done these before, but not like this. You have really put a lot into them and have taught me somethings, never thought about the Versamark. I just love them.
OMG!!! These are just beautiful. I have done these before, but not like this. You have really put a lot into them and have taught me somethings, never thought about the Versamark. I just love them.
Great tutorial! TFS! How great that you got your husband to help.
Love your tutorial! Love that Brent helped you out!!!These came out amazing…love the printed tissue paper idea.Merry Christmas, my friend! You are awesome!
These turned out great!!! Have a Very Merry Christmas!!
Found your blog through our mutual friend, Melissa. What a great idea to use pre-printed tissue. These turned out SO cute! Thanks for sharing!