Tutorial: Popped Metal or Metal Popping
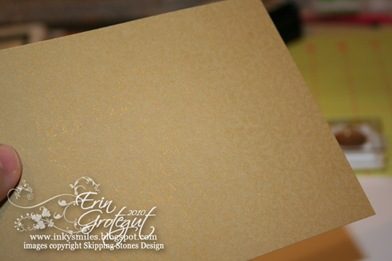
I had so much fun making my last SSD card and figured I should share with you how I did my background for my “masculine” card. I think I will call this technique “Popped Metal” or “Metal Popping”. I was going to try to use a “Chalk Popping” technique on the card but realized I needed to think up something else when I peeked at my chalks and saw that I only had pastel colors… so I pulled open my “messy embellishments” drawer and my eyes were immediately drawn to my metallic pastes. VOILA! IDEA!!! BLING BLING! This is amazingly easy (basically TWO steps) but gives a really cool result… so here we go… You will need: * Versamark Ink Pad * Metallic Rub On Paste (mine came from Gina K Designs) * Detailed stamp ( I’m using Rustic Tiles from Skipping Stones Design) * Sponge * Colored Cardstock & Scrap paper (to protect workspace) Step One: Ink up your image with a clean Versamark pad (you don’t want to use one that is stained with colored ink because it may transfer to your artwork – ick!) Begin stamping your image. I like to start off the page so the design runs off the page. Stagger the images on each row so you don’t have “running seams”. Cover the entire piece of cardstock with the Versamark stamped image. Be careful not to “smudge” the images with your fingers while stamping… what you smudge will show up in Step 2. Here you can see the CS covered in Versamark images: Step 2: Gently rub your sponge in the Metallic Rub On Paste. Don’t glop it on because it will come off too thick on your artwork and make a royal metallic mess. This requires a LIGHT touch, so if you have lead foot fingers like me and just want to SMOOSH that ink in stop now and take a breath. LOL! Start at one corner or end. Using just a teeeeny weeeeeny bit of pressure… just enough to transfer the Metallic Rub On Paste to the paper…. rub the sponge over the Versamarked images in a circular motion. You will start to see the images POP out in metallic splendor. If you have gaps between your images be careful not to rub the paste down in the gaps or you will get a “grid” look. But if that’s the look you’re going for, then hey, go for it 🙂 Continue rubbing the Metallic Rub On Paste on the Versmarked images, “reinking” the sponge as needed, until all the Versamark has been popped out. Finish at opposite end/side of where you started. I love how this looks… you can go back and darken areas for a more distressed look or for shadowing for the images you might be layering up for the final product and ink the edges darker with the Metallic Rub On Paste. Here’s how I used this background piece: Thanks for playing today! Inky Smiles!
Skipping Stones Design Sketch Tuesday: SSD022 Surrender to the Wind

Happy Tuesday Inky Friends! Sadly, today is our last sketch with the awesome Kimberly Crawford, but I really had fun with this one. It’s a simple, straightforward sketch, but I had an idea almost immediately and created my card last TUESDAY, which is NUTS for me. LOL! Usually it’s Saturday night and I’m stressing about it. hehe! Anyway.. moving on… Here’s today’s sketch: I played around with the Whispering Wings stamp set and decided to go with something a little more “masculine”. I seriously don’t do masculine cards because I have the hardest time with them, too, mainly because there are so many “girlie” stamps and images on the market and the masculine ones are usually “cheesey” or juvenile. However, comma, but… the cattails in the Whispering Wings set worked out just perfectly for me for this card. I took a little artist liberty with the sketch and elongated the focal point. 🙂 I inked the cattail image up on an Olive Green CTMH ink pad and then used a baby wipe to wipe the green off the actual cattails which I then colored with a brown marker and stamped onto a cream cs. I colored the cattails in with colored pencils and OMS. The image is stamped in Chocolate Ink by CTMH. Edges are distressed with Tim Holz’s tea dye distress ink. The sand colored background needed some type of texture/depth, but I did not want to “sand distress” or “direct to paper ink distress”, so I fiddled around and came up with a cool technique that I will share with you in a tutorial on Wednesday. (It’s all typed up and ready to go!) Oh how this card was difficult to photograph to show the background detail. LOL! Here’s a little close up at the background. Be sure to check out the creations from our other lovely Skipping Stone designers!! (List on the right side bar of the blog.) Inky Smiles! See you Wednesday! Creative Supplies: Stamps – Skipping Stones Design Whispering Wings Inks – CTMH Chocolate & Olive Green, Versamark Miscellaneous – SU felt ribbon, fabric glue, misc paper scraps, watercolor pencils, OMS, metal paste. PS – This just in: GOOD NEWS – Skipping Stones Design is having a P.M.S. Sale! P.M.S.~ in this case~suffering from the NEED to Purchase More Stamps! Buy 1 stamp set save 5%, for a total of .73cents off. Coupon code: PMS1 Buy 2 stamp sets & save 10%, for a total of $2.90 off. Coupon code: PMS2 Buy 3 stamp sets & save 15%, for a total of $6.54 off. Coupon code: PMS3 Buy 4 stamp sets & save 20%, for a total of $11.60 off . Coupon Code: PMS4 Buy 5 stamp sets & save 25%, for a total of $18.10 off. Coupon Code: PMS5 *This sale will last until Saturday May 1st at midnight All the details on this sale can be found on the Skipping Stones Blog.
I’m Such A Copy Cat

I loved Jeanne Tomshack’s post of her Egg Wreath and had to copy it. I love putting different wreaths on my front door for the seasons and holidays and didn’t have an Easter one. I didn’t want to purchase a ready made one because they’re in the $30-$40 range for what I was liking…. so I decided to case Jeanne’s Easter wreath and wait to buy one after the holiday on a good sale 🙂 I went to our Dollar store and picked up some eggs (36) and a wreath form. I had some leftover “grass” from another project. They didn’t have any foam forms so the wicker one had to do. It was a little bit of a pain to work with, but the glue gun and I won the battle. Glue your first row of eggs to the back edge and side of the wreath form and then add another “row” above that row. Squeeeeeeze some nice hot glue out onto the form between the eggs. Look at all that molten glue… The predecessor to some nice blisters. Then begin the process of gluing in the Easter grass/shred. This is where an old chopstick comes in handy. Trust me. Poke, poke, poke… Continue around your wreath form until you’ve filled in the first set of gaps. Then layer more eggs. And repeat the chopstick poking…. …..for about an hour and a half if you have several interruptions like doorbells and dogs or wee small children or teenagers acting like children or husbands chasing wee small dogs acting like children or something… Until you get something that loosely resembles this: And then go and dig in your fabric remnants basket to find a big “faux” ribbon cuz WalMart just doesn’t have anything that will work in a quantity smaller than 30 yards. And tie it to your craziness wreath. And hang it on your door. And realize that your door needs a bath and last night’s wind frayed your “ribbon”. But you don’t care ‘cuz you have cupcakes to go mess with 🙂 ~Inky Smiles
It’s Always A Good Time For Cake

It’s always a good time for cake, and my birthday was a couple of weeks ago, but I didn’t have CAKE this year so I figured I’d whip up something yummy for myself. LOL! Yeah yeah yeah… cake is seriously the best part of birthday celebrations… well, besides spending the day with loved ones. Cake, well, it’s da bomb. So anyway.. I’ve been on this crochet kick the last couple of weeks and I have been having a blast. I was seriously HATING crochet years ago when I desperately tried to make a blanket with my friend, Janeen, who was also making a blanket…. However, comma, but…. Here’s what I have decided regarding crochet: 1) I do not like crocheting large items like blankets and afghans that I have to pay attention to.. lol.. like counting a gatrillion stitches and crocheting the same number of stitches for an eternity of rows. 2) I must break my projects down into bite size pieces. 3) I like crocheting small things like hats and cupcakes and flowers. SO off I went into the world and did some shopping for some better yarn than what I had on hand.. … and back again I went into the blog world for more inspiration and ran into Wendy Tunison again on her blog and found her also crocheting again. (That was when I found THE HAT POST and made my red hat and the cream hat.) Well it turns out that our “The Art of Crochet” YouTube video friend, Teresa, has a PLETHORA of marvelous and easy to follow videos for crocheting a variety of projects and yarny delights. You can visit her BLOG for more inspiration as well. But first… I had to make these way cute hats for my sister’s two darling girls: The hats are PINK like in this bottom photo, not purpley… The lighting was weird in my kitchen when I snapped the first pic. I made up the flower which is a stacked pile of two individual flowers and one yarn “center”… the first “row” of the flowers without the petals. These hats went a lot faster than the first couple I made. Once you “get” the stitch and the patterns they seem to go quickly. 🙂 Ok so back to CAKE. Yum… I think I might make one later for tonight’s dessert. Hrmmm. So while I was perusing Miss Teresa’s YouTube channel, “The Art of Crochet” I came across this way adorable Mini Cupcake tutorial. Oh delight of delights!!! I started it Monday night (like waaaay late) and then had to wait to finish it until Tuesday night after work and then this am I made a second one. Here are my first ever cuppycakes. The one on the left is my own crazy creation and the one on the right is the original from the tutorial. I didn’t follow the instructions for the right side cupcake because the yarn I was using did not work well with the rib stitch. As you can tell by the photo the rib stitch makes the difference in shaping the cupcake “paper”. On the left side cupcake I took some liberties and had some fun. I felt like the frosted top needed more height and some added “blingy treats” so I added a row of single crochet stitches before adding the last layer of “frosting ruffles”. I topped it off with a small cream colored flower for “whipped cream” and a red ball for a “cherry”. YUM! I just want to eat the one with the cherry and whipped cream! Nom! Nom! But then’ I’d have to deal with a hairball, so I will pass. Yummmmmmm!!! MMMM… I think I need a treat! LOL! These cupcakes are so easy and fun to make and I can’t wait to make more, but first I have to move on to/finish some other projects that I have had rolling around in my noggin… think jewelry…. *grin* Well, I’m off to write another blog post for later this week and get this one posted. Happy Crafting & Inky Smiles!
Scrap My Scraps II: Reveal #2 – Stacey Tippetts

We’re up to Reveal #2 today in the Scrap My Scraps II challenge. This is so fun for me getting to see what other people come up with using my “odds and ends”. I’m waiting on the rest of the group to send their photos in. I believe that one set went MIA in the mail but hopefully the others make it here soon 🙂 Today we have a treat froM Stacey Tippetts What a treat when I opened my email and received the photos from Stacey and all her delightful projects! I love all her little giftie ideas! AND…. she’s also a crocheting fool. LOL! But I think she’s been a crocheting fool a LOT longer than I have been. I love her idea to attach the gifties to the card. Thank you Stacey!! Check out all these little treasures. {You can click on any photo to view larger in a separate window.} Magnets in Origami Gift Box: Hair Clippy Gift #1: Hair Clippy Gift #2: Hair Clippy Gift #3: (before flower is attached, with flower attached, inside) Welcome Baby Gift: Cards:
Scrap My Scraps II: Reveal #1- Emily McLemore

I’m starting to get the photos in from the players in the Scrap My Scraps Challenge part II. I was so excited to see this email from Emily McLemore come through with a lot of photos. She created this darling banner project to use up that Pepto Pink Paper. And seriously, I’m not hating the paper as much. Sometimes it really just does take a different view on something to change your mind. I love how Emily added all the ink and distressing to change up the papers. <—— Look at all the details on this banner. Emily cut out the gift images and further embellished them by adding glitter and bling to each individual piece before tucking them neatly into place. Love it! There are bits of paper used neatly all over this project. I think she had to have used a lot more than 50% of what I sent her! I love that she added the flowers and coordinating papers. Everything just ties together so nicely! Thank you Emily!! Be sure to check out Emily’s blog. She might just have some candy for you! ~Inky Smiles!
Blog Candy Winner Announced

Hey friends! I realized that I did not put an announcement date on the blog candy, so I figured I’d better give it away now before I go too long and forget. I pulled up Random.org and had it “draw” a random number between 1 and 16. Drum roll please…. The lucky winner is Stacey Tippets is Comment #14! Congratulations Stacey! I will pop THIS UNRELEASED Skipping Stones Design stamp set in the mail to you this weekend! ~Inky Smiles!!
Photo Roundup: Creative University 2010 – Make-N-Takes

I’m finally getting around to sorting through my photos from Creative University. Let me just tell ya… I had SO MUCH STINKIN fun!!! n (Ok, well Stacey and I missed the “stinky” part because the Friday group had the water run out on them and nobody got showers…) We made some projects and crafty goodness on very little sleep. LOL! Here is a brief photo summary of the projects we made. ************************************************************* Wall Hanging w/Elegant Paper Flowers ~ designed by Denise Anderson-Turley This beautiful project that Denise designed was fast and easy to put together … that is… until… we had to make…. THOSE CRAZY FLOWERS. LOL! That little tag on the left slips in and out for hidden journaling. The papers are all distressed with Tim Holz’s distress ink in linen and tea stain (I mixed them up). I also spritzed some shimmery schtuff along the top left corners and the bottom right section of the artwork. The flowers are also shimmery. The leaves of the flowers are inked to death with Tim’s tea stain distress ink. (Denise’s original piece was not as inky/messy/aged as my piece. I just wanted it shabby.) The flowers are crumpled “paper ribbon” flowers that are hot glued as you go along. I burned my fingers and got annoyed with the hot glue so I gave up and went back to my seat and used my Helmar 450 glue. It dried fast, but did not burn or dry TOO fast (like cooling glue). It took me a while to get the technique down and once I did the project flew right along. I need to get a “class” photo to put on this piece o’ art. 🙂 🙂 ************************************************************* Vintage Songbird Necklace ~ designed by Bren Yule OOOH… a girl can’t go wrong with a JEWELRY making class! Yeah babeeeee! Bren designed this BEAUTIMOUS necklace using a key fob and some crafty supplies including rhinestones, a paper flower, a bird “brad”, and some vintage style music paper. Before and After…. ************************************************************* Watercolor Pencils Cards & Scrapbook Layout ~ designed by Nona Davenport I haven’t finished mine yet, but here’s Nona’s. Mine is sitting here on my desk waiting for me to create a title and stick some photos on it… hahaha…like I ever stick photos on my pre created layouts. I’m so bad. I need to develop some CU pics first!!! I took some liberties with making mine …well, MINE. I changed up the layout a bit and added some shimmer to it.. cuz all ROCK STAR layouts need some shimmer! My cards are also half done. I am trying to get everything finished up tonight so I can have everything DONE! I should have finished everything AT CU, but we were having so much fun visiting and doing other crafty things, too. LOL! See… it’s sitting there… waiting.. for you know who. But I’d rather take a shower and hit the sack than finish it up tonight. The cards are in the little baggie in the very far left corner…. also waiting… poor little cards. ************************************************************* Spring Banner ~designed by Tresa Black OOOH!!! This banner is so fun and sparkly and springy and just delightful! We made each “block” at different stations over a period of two days. There wasn’t anything “difficult” about this project, just a lot of steps on each block and LOADS of glitter and glittery goodness to let dry. LOL! I’m going to hang this in my front room for some SPRING cheer tomorrow! ************************************************************* “Unofficial” Crocheted Necklace Class ~ held during free time by yours truly Several ladies wanted to learn my crocheted necklaces so I told them I’d teach them during our free time at CU. I was surprised how many actually brought their supplies and were eager to make the necklaces. It just made my day!!! Here we are learning and playing: Thank you to Wendy Tunison for the photos! She’s my Paparazzi girl! LoVe HeR! That’s Connie Dryer in the above left photo. She went hog wild making crocheted necklaces… She holed up at a nearby table when we were done and made SEVERAL more crocheted beauties! So glad to get ya HOOKED on another hobby!! 🙂 That’s it for the first Photo Round Up from CU… I will post more soon! ~Inky Smiles! PS.. Tuesday (March 16th) is a blog hop for Skipping Stones Design and I have something to give to a lucky somebody! See you Tuesday!
…and now I’m back…. for a minute anyway

Hey friends! I am BACK from Creative University… OH MY GOOODNESSS! I am so exhausted! We had such a delightful, fantastic, exhausting, phenomenal BLAST! I can’t even begin to describe the amount of crazy fun we had. Let’s just say: Tresa Black ROCKS and throws one heck of a party! My roomies ROCKED! I met some FANTASTICALLY FUN people!! AND I will be BACK next year. 🙂 I won’t have a SSD Sketch for you this week. I am exhausted and extremely busy which is a bad comobination. I just got home last night and am totally beat… My birthday is Tuesday and I have to work and then head home to pack and leave for Denver with Brent on Wednesday am after my dr appt (to figure out what’s wrong with my knee) for a work trip which is turning into a birthday getaway with my hottie and a visit (ahh… PLAY DATE) on Thursday with Jeanne Tomshack. I am SO EXCITED 🙂 So until I return I will share with you a couple of photos that Nichole Lewno took at CU because I have not even unpacked my camera! LOL! THANK YOU NICHOLE!! U ROCK 🙂 ~Inky Smiles & Enjoy! My FABULOUS ROOMIES (Dana, Wendy, Me, Donna, Stacey) & The outrageously fun and crazy Donna Smith Me, Donna Smith, Nichole Lewno, Sheila Bennett This is what happens when you’ve had entirely too much sugar and the photographer is not really looking AT the photo in front of them 🙂
You’ve Got To Start Somewhere – A Traditional Paper Layout

{Scheduled Post} Ok so don’t pass out. LOL! I PAPER scrapped last week. Ay yi yi… I can’t remember the last time I seriously scrapped a layout with paper and traditional supplies… meaning non-digital. LOL! This layout filled two purposes for me. I needed a paper layout for one of the art contests at Creative University and Erin Gudge (the OTHER Erin G) at Treasured Scrapbooking was holding a Guest Designer contest for her store and pointed me in the direction of the details for the contest… so off I went to Treasured Scrapbooking and found the details. Here are the requirements: 1)Your layout must be based on the origins theme (meaning, the beginnings of SOMETHING) 2)You must use at least seven flowers (can be handmade, but patterned paper doesn’t count) 3)You must use at least one button and one gem/rhinestone of some kind 4)You must use at least three patterns of paper (can be included in your flowers) 5)You CANNOT use a plain CS background (you can use it as support, however) 6)You need to use at least three photos So I went to work dreaming up a sketch in my head, then transferred it to paper and then decided on my “theme” for the layout. I decided on doing the origins of my scrapbooking. I pulled out a few of my old scrapbooks and snapped some photos of what was in them. It was neat to see how I’ve changed over the years. Here are the photos: You can see how my scrapbooking has evolved over the years. The top right photo is of a scrapbook I made in 1984. The bottom left is from a “scrap” book I made in 1994 and the bottom right is from 2004. I combined all these layouts in today’s style of layouts (for me). Look closely. Can you see the hidden journaling? And the hidden birdie? Ahh… there’s the journaling. Tucked neatly behind the photos with a ribbon pull tab that’s wrapped around the back of the layout. I go home from Creative University today… Can’t wait to share the photos and fun stories and artwork!! ~Inky Smiles! Supply List: * I used a variety of odds n ends papers that I had on my desk. I had already cut off the manufacturers labeling… sowwy…. The embossed paper on the left hand side is a VERY old “India” paper from Provo Craft. I LOVE that stuff. * Buttons came from my dresser… you know those extra buttons you get with new clothes? Yup… found a way to use them and now I hope that I never lose a button from my fav shirts. * Ribbon – STampin Up, Rhinestones – Kaisercraft, Flowers – Michael’s floral department, Birdie Rub-on – American Crafts