Mini Purses – Quickie Party Favor “Bags”
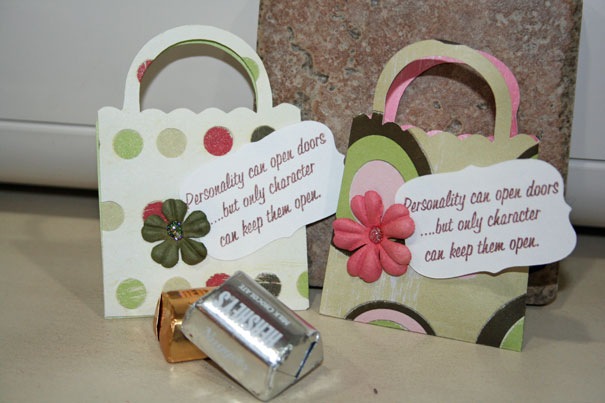
Quickie post today. I was working on a small project with my friend, Amanda, for a church activity. She needed to cut our some “party favors” – 40 mini purses and tags to hold little candies so we went to town. I have to say THANK GOODNESS FOR MTC!!!!! I don’t mean the LDS Missionary Training Center.. I mean MAKE THE CUT and my Cricut Expression! I’ve been playing with the demo version for a while and finally a month or so ago bought the full version of it. I love the endless possibilities of using my existing digital art and most of all FONTS… I don’t have to buy a zillion font cartridges. SO HAPPY! Now, before you Cricut professional ladies go ape on me and tell me I could have done it all with a cart and my dial, I know, I know I could have…. I specifically needed to resize these purses and tags by scaling them and not just tweaking the measurements on the roll-y dial or on my Gypsy (which I haven’t played much with YET). I downloaded some FREE images from the MTC forums and loaded them up. I stamped an image on some scrap paper to figure out the exact size I needed to make the tags. I loved that I could scale it all on my computer right in front of me. I cut out 48 purses and Amanda and I scored and assembled them and then she came back over last night and I cut out 40 bracket labels and left them on the mat while I stamped a sentiment in each one. It went soooo fast! Then we adhered the labels to the mini purses and stuck little flowers on with some Glitter Glue and added glitter centers to the flowers and popped little Hershey nuggets in each one. These are really super simple and boring but they needed to be quick and easy peasy. Not a lot of Erin Fru Fru on here, but hey they are cute and they will work 🙂 YAY!
Creative University Recap #2 – Cluster Necklace – My Class
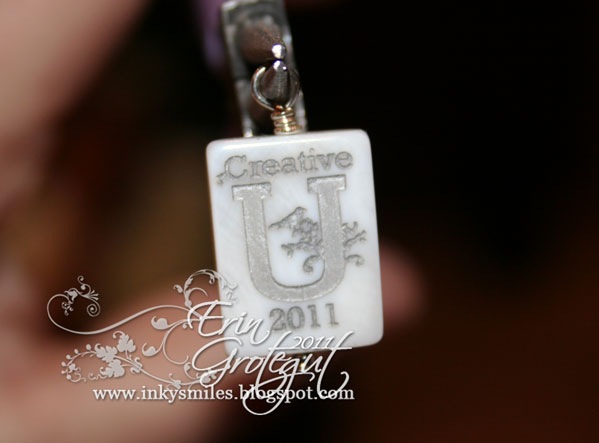
Sorry for the delay – I got a little distracted by some things at home. Back today with another Creative University Recap. Tresa asked me to be a teacher for C.U. waaaaay back in the fall of last year. I was so excited and nervous and had a trillion ideas going through my head and then she specified that I would be teaching a Jewelry class. Oh boy… more ideas started swirling around… and then I settled on one idea. Here is the cluster necklace/junklace that we made for my CU Jewelry class. I went to a few gem fairs and jewelry shows with my friend, Valerie, and started collecting goodies that I could incorporate into my project and started making a prototype. I spent a couple of weeks hemming and hawing over the last couple of elements for it. I had a budget but I liked the rolo style chain better than the “gangsta style” curb chains and I had an idea for a fabulous “souvenir” style charm that I just HAD to squeak into the budget. Well, I threw the budget out the window and spent a little extra on my project. It was so fun and so worth it. Packages of goodies in my studio.. It was like Christmas.. a big, fat, blingy Christmas! Here I am adding the first sneak peek to the CU students facebook page. Buwahahaha. I loved being just a little sneaky! I pre made 120 charms for the necklaces. First, I did 61 (I broke my first one, which is why I premade them) crystal drop charms shown below tied together like a chandelier. And then I premade 60 of the custom designed mother of pearl CU “souvenir” charms. I designed the artwork in Photoshop Elements and then brought it over to Valerie’s office and she laser engraved them for me. BUT, laser engraving was not the last step before they became charms. I hand filled them with silver paint and then cleaned each individual charm and set them to dry. My fingers were painted in silver splotches for a couple of days. Here are a couple of snap shots of my CU souvenir charms. Once my two premade charms were completed and ready to go I set out to sort out parts for 60 kits. Holy moly… this was a LOT of sorting of teeny weeny pieces. And then I packaged them all up into neat little bags and topped them off with cute little cardstock “toppers”. Ready to go to Creative University! I taught two classes at CU. One Friday night after dinner and one bright and early Saturday morning. Here are some snapshots of the two classes. We had so much fun and everyone finished their projects before they left class! Teaching wire wrapped loops with Erin’s Pipe Cleaner-Noodle Method. Not sure WHAT I was saying or thinking or cheesing with that crazy look on my face but I love the sexay apron that Tresa made for us teachers! I had four FABULOUS teacher’s assistants/Charm Fairies (two for each class) who were amazing and helped keep us all on track with our charms and necklaces. My Fairies were Kari Seals, Tamara Werderber, Melody Pugh, and Michelle Johns. I made each of them a special charm as a thank you gift. Here is a pic of me and three of my Fairies… I’m not sure why Tamara isn’t with us but I went back through my pics and found one of me goofing around with Tamara and Kimberly. And here are some random fun shots of my classes. I had such a fun time teaching this class! I think everybody learned something new or sharpened their skills or opened the doors to a new hobby. Inky Smiles! PS.. If you’ve read through this entire post, thank you! Leave me a comment on this post and tell me why you need a new pair of earrings (be creative) and I will draw a winner for a pair that match this necklace! Winner will be posted on Thursday night after 8 pm mountain time. Winner will have 2 days (claim by Sat 8pm) to claim the prize before another winner is drawn. Please email me your contact info once your name is drawn.
It’s Great to Be EIGHT Layouts – Digital Scrapping!

(I haven’t forgotten to come back and post the rest of the CU pics and fun, but I’ve gotten a little distracted the past couple of days. I’m working on them and I will be back with more!) This morning my friend, Suzi, came over for a visit and to work on some projects for the kids in Primary (church young children’s group). She needed some layouts/templates for the kids who will be turning eight and getting baptized this year. We had a lot of fun going through some of my digital supplies this morning while I threw these layouts together. I think I really need to get my digi schtuff moved over to the ehd and organized here asap! Here’s what we came up with. These layouts can be printed straight up and have a pic adhered to them or they can be used as a “quick page” in PSE and have a digital photo inserted in the layout. These pages will be used as a cover for a little book that Suzi is making for each child for their baptism day. The layouts are a standard 8.5” x 11”. I did one layout for the boys. I used papers and elements from “His Playroom” by Tracy Reid from Sweet Shoppe Designs. The font is Rockwell. Not sure who designed the stitching… For the girls we did two layouts… but not intentionally. LOL! We got the first pink one done and noticed that the paper did not extend all the way into the frame on the right side, and then we decided to try a different paper just in case some of the girls weren’t “froo froo” pink girls. I love them both, but I really like the yellow paper layout! I think it’s a little more versatile. The papers and some of the elements came from the Shabby Miss Jen “Sweetie Pie” kit. The stitching, lace trim, photo frame, and tab came from miscellaneous other kits that I separated before I tagged, so I have no clue who they came from. The font is BrodyD. Thanks for popping in! Inky Smiles!
Creative University Recap Post #1
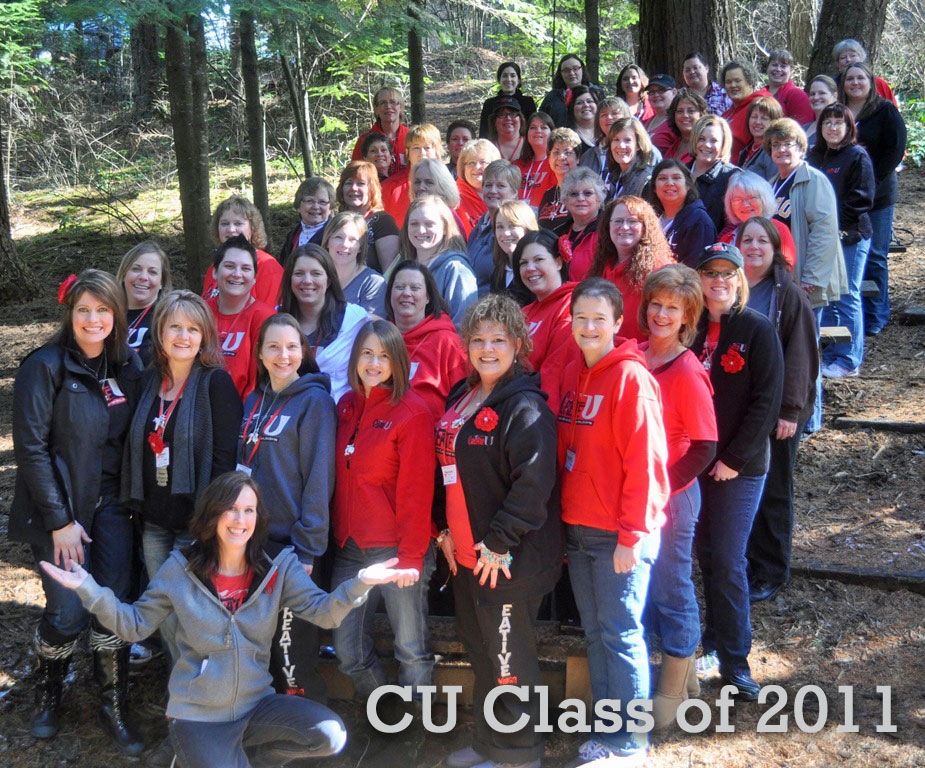
Oh my gosh, I have been SOOO sick this past week. Hopefully since this is my birthday (I’m celebrating the sometheenkth anniversary of my 21st birthday on Tuesday) week it will get better and we can have some fun with cake and ice cream and friends this weekend! I did go back to the dr again last night and he gave me antibiotics for this bronchitis and it seems to be workin already! YAH! The crappiest thing (can I say crappy on a blog?) is that this sickness has put a real downer ending to a really FABULOUS retreat with some AMAZING women at Creative University. I had a most wonderful time but I feel a little like that come home “high” from the retreat was stolen from me so I’ve been trying to “regain” my “high” by looking at the pictures and projects from this AWESOME weekend! I had SUCH a good time and think this year was even more fun than last year! Here is our CU 2011 class photo. I made it to the photo this year! LOL! Let’s play “Where’s Erin?” and see if you can find me 🙂 Creative University Recap Post #1 Part of my birthday celebration was Brent and I spending some time together on this trip. The other part comes later this month… more deets later. So anyway, Brent and I drove up to CDA (Coeur d’Alene) on Thursday and camped out at the Days Inn hotel. It was quite a beautiful drive with the exception of the snowstorms we hit in the night as we crossed over the Rocky Mountains two times on curvy mountain roads. I think if it wasn’t dark it would have been more of a fun adventure, but driving in the dark in a snowstorm is always a bit scary for me. Friday morning we loaded up in the car and headed over to Camp Lutherhaven so I could get checked in and unpacked and start the fun. Friday during the day was mostly free for us. I packed my little “go to” crafty crop bag ($6 @ WalMart – sweet!) full of goodies and started playing… We had a fabulous “Card Boutique” that was presented by Sheila Bennett and Donna Smith. Here are the projects we made. I didn’t follow all the instructions so if mine look slightly different than others you may see on other blogs, that’s why. Sheila’s Cards: These are all little cards that you can slip gift cards in… or a wad of cash….. Donna’s cards: Super fun cards with some springy new CTMH papers. Also on Friday morning I had a mini class with my Charm Fairies/Teacher Assistants to help them make their projects for my class since they’d miss being students in my two classes. From left to right: Kari Seals, Michelle Johns, Tamara Wederber, and Melody Pugh. These girls were so awesome and so much help!! I taught one class Friday night and one class Saturday morning. I will share pics of the class and the project tomorrow. Also on Friday Tresa presented her teachers with some fabulous gifts… sexy aprons and some va-va-vooom hair bows! I absolutely LOVE mine. It’s perfect and totally me! I will be back tomorrow with some pics of my class and class project… here’s a teaser: Inky Smiles!
I WON, I WON, I WON… Well, It’s LIKE I WON…
Hey there friends! Recently I was invited by CSN stores to do a promotional review on my blog of some of their products. Well, being an adventurous kind of girl and knowing my love of the EASE of online shopping and comfort of doing it from home in my crazy snowman pajamas, of course I accepted the offer! I feel like I’ve won some major contest… HOLEE MOLEEE… have you visited CSN stores lately? It’s like having the Mall of America right at my fingertips… buh bye shopping blisters on my poor feet! Gazillions of products for me to peruse and pour over in the matter of minutes, uh, well… ok I perused for more like a couple of hours. “Oooh Brent! How about one of these? Or one of these?? OR Check this out!” Haha! CSN has pretty much everything a home wants, needs, wants, needs… (what’s the difference? Haha!) Do I buy a cute animal and alphabets print for my niece’s wall or a bbq set for Brent, a fabulous swing set for my back yard, or a zebra striped rug for my Studio floor? Want to see what I ordered? So do I!! Tee hee! Pop back over in a week or so and I will be glad to show you what I ordered! I’m sure I will be over the moon about it! Inky Smiles!
You Said Twinchie, But Did You Mean Twinkie?
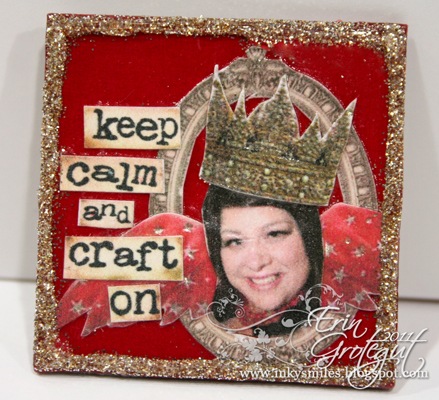
{ACK! THis was suppposed to have posted while I was away at C.U…. I opened up Live Writer this morning and there it was still in my drafts. Ooops! Anyway.. I am back from CU but am sick as a dog. I spent 4 hours at instacare on Monday night because I had a 101.7 fever that would not drop and could not stop coughing. Well, my fever has dropped to about 100, waffling back and forth between 99.5 and 100, but I’m still getting the ultra upper body workout which is sponsored by the letter C for cough. I am currently sifting through the 270 pics I took at CU and hope to have some posted by this weekend. Today is the first day that I have been able to sit upright out of bed since Sunday. Be back soon!~} Hey friends! I’m off having fun at Creative University but I thought I would share with you one of our “group art projects”. Tresa asked us each to make a “twinchie”… HUH? A what? Don’t ya mean twinkie? You know, those fluffy uber preserved puffy cake things filled with a mystery cream that will last through a nuclear war with the roaches? Nope. She meant a twinchie. A two inch square bit o’ artwork. I knew what an inchie was but I guess a twinchie is his big brother. The “rules” were to stay within the theme.: WINGS “Creative U is about spreading our wings, learning to take chances and try new things, and lifting each other up. Any image or word can be used to follow the theme, use your imagination!” I’ve always wanted to get into collage and I “guess” this is my feet getting wet. This twinchie was SUPER fun to make. I cut a 2×2 piece of cardboard and mod podged a piece of red cardstock to it. Then I created/printed the digi images onto white cardstock and adhered them to the red background… mod podging between layers so that everything was good and STUCK. And then I drew a line with Crystal Laquer around the edges and sprinkled it with Martha Stewart Antique Silver glitter, let it dry and covered it with more Crystal Laquer and set it to dry overnight. It turned out fantastic. Well, until I decided that I thought it needed another coat of something harder than Crystal Laquer…. (Keeping it real here….) I put on a coat of Sally Hansen super hard nail polish. Oy Vey! Nail polish + mod podge = disaster. All sorts of bubbly disaster…. So I started over. And this is my second piece… It’s not nearly as pretty as the first one was but was done and I had no intention of starting over again. Thanks for stopping by! Keep calm , craft on, and try something new! Inky Smiles! Oh and PS… if you get the muchies while crafting you can always snack on a couple of these….
Faith, Family, Friends
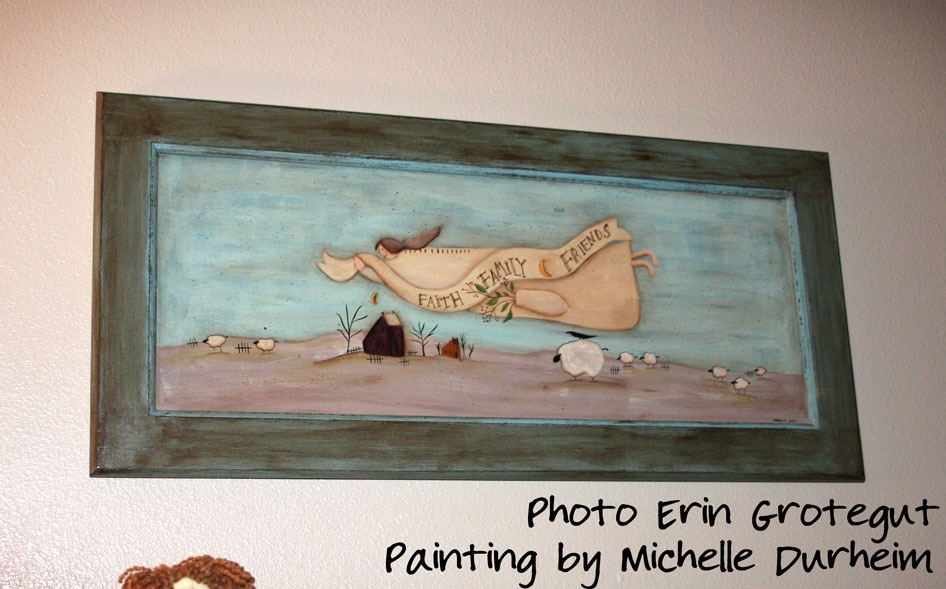
{scheduled post} The world of crafting has connected many hearts and built many friendships. I have been lucky to have made many friends in my creative journey via the internet and have even met many in person. One friend who I have not yet met in person but would love to someday is Michelle Durheim of Creative Treasures. She is so incredibly talented and I have spent many hours drooling over her creations on her blog. One day while I was drooling over some creations I noticed that she had a painting at the very bottom of her blog… a gorgeous primitive angel painting. So I messaged her and long story short… one day she posted that she was working on another painting and if I wanted it she’d sell it. REALLY??? YES, YES, YES! {cuz while I may have some creative bones, I don’t have a painting-that-needs-to-look-like-something bone in my body….} So one day a surprise arrived in the mail. I squealed with joy. {really… and Brent did roll his eyes at me} and we opened it up and I convinced ,made, begged Brent to hang it for me. It’s hanging in my front room above my red hutch which holds an assortment of framed family photos. {We’ve since moved the ipod dock and taken down the fall decorations.. lol} This lovely scene is painted on an old cabinet door and I just love it. I have wanted to share this for a while now and finally found the photos hidden in my crazy huge stash of digital photos. So hard to take photos in the house…. I am particularly fond of primitives, salt box houses, colonial themed goodies and this just makes me smile every time I look at it. The full photos do not do it the justice it deserves. Here are some close ups of the fabulous detail. Thank you Michelle! I am glad to have one of your Creative Treasures and delighted to count you as a friend! Inky Smiles!
Happy Valentine’s Day!
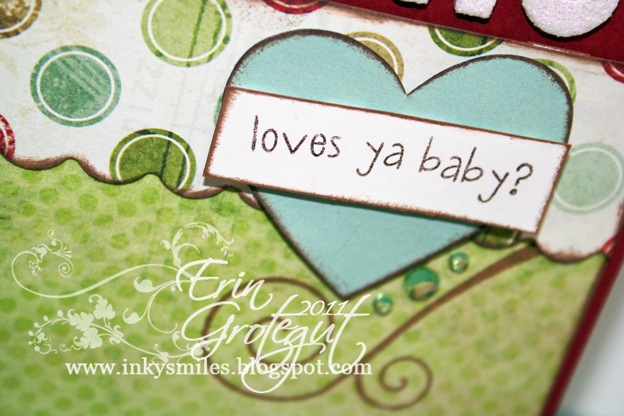
So I couldn’t share this yesterday (Monday) because I never know when my sweet husband might be haunting my blog. And ya know, I really didn’t want him to see this ahead of time. 🙂 He likes surprises and sweet notes. We had a quiet and sweet Valentine’s Day and attended his brother’s wedding. Next week we hope to do a fun/fancy dinner. I am mostly ready for CU.. most of my goodies are packed and I am tying up a few loose ends before I go. I slipped back into my studio the other day to whip this up for Brent. It’s a simple little card.. standard size with a message that’s “to the point”. 🙂 I used some plain red cardstock, some patterned paper (I can’t remember who’s it is, haha) a Fiskars scallop border punch, some ColorBox chalk ink, some AC Thickers (glitter – yes!), a few KaiserCraft rhinestones and a couple of stamps from the There She Goes stamp set “What a Hoot”, and some AC Foam tabs for dimension. OH, and I used my awesome corner chompers by WR Memory Keepers. I love that little chomper! I freehanded the heart and I am happy it turned out so well on the first go.. usually my hearts are pretty lopsided! Who loves ya baby? I do! Inky Smiles!
Digital Art: More Charming Images

Busy in the studio on the computer still… I’ve been LOVING playing with digital images and and creating fun little doo-dahs. I’m in charge of the Charm Swap at Creative University and have been having so much fun with my charms. I can’t show you my charms just yet but I wanted to share with you the image I am using on one of them (the Victorian Vintage Charm Swap)… This image is MUCH bigger than what the charm image is. Think very small… under the size of a quarter… Don’t worry, you can still see all the fabulous detail in the finished project. Something like this: I created the image in Photoshop Elements using images from Itkupilli’s free test sheet. I created the word art using rectangles that I colored, aged, and snipped. The text is made up of individual letters from the Portable Remington font that I manipulated individually (same as the charm cards I shared previously). The finished product is glittery and sparkly. I can’t wait to share! I also made some new charm cards in a blue tone. I was trying to use the CU “colors” for the last set of charm cards… I like these better but the first set of charms was already packaged so they’re staying on red cards. LOL.. .the Under the Sea charm swap will get these blue toned cards.
Picaboo Calendar Winner
We have a winner for our Picaboo calendar! Random.org chose for us again this time. Please give a round of applause to: Comment # 3 is from Krista Openshaw: “I LOVE your jewlery ideas. Still doing the crochet necklaces, but I would love to learn different techniques in jewlery making.” Congratulations Krista!